
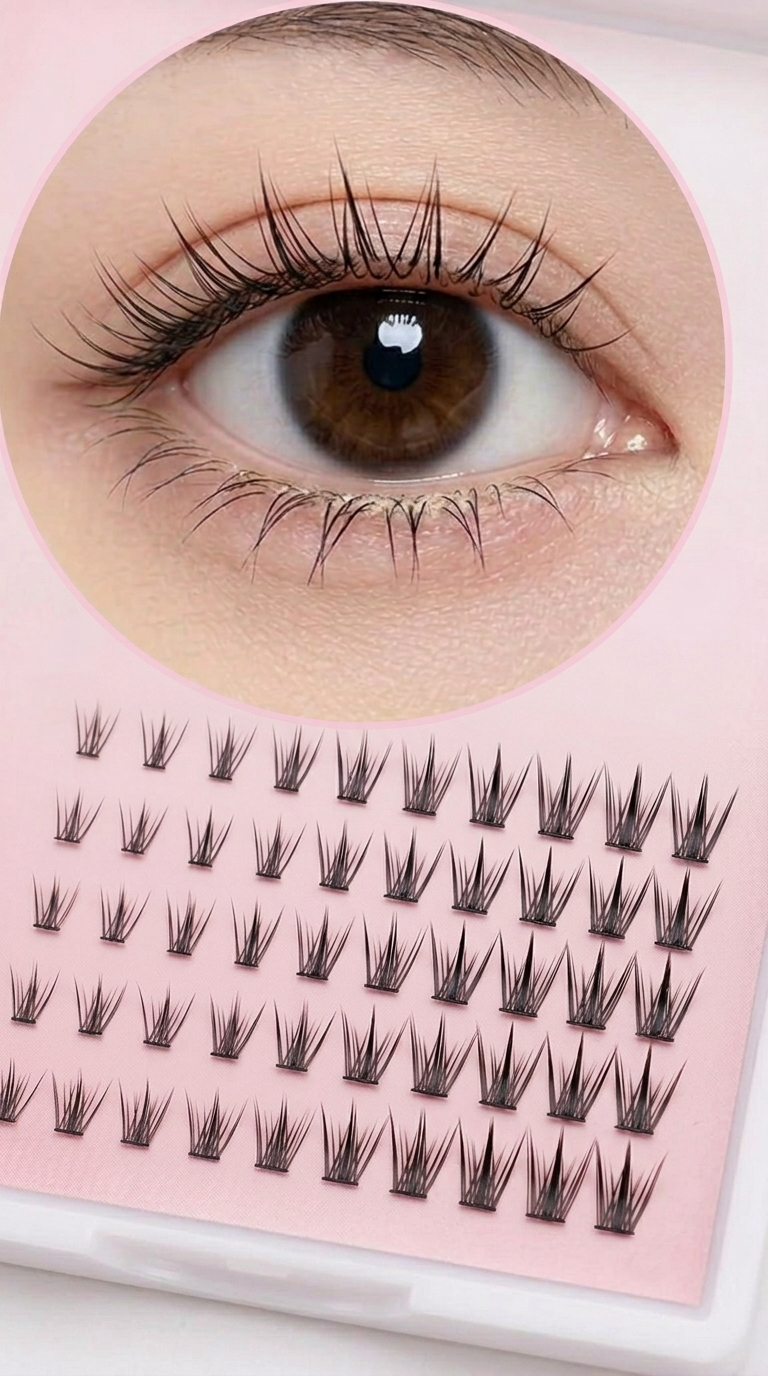
In the beauty community and all over Instagram, if there is one eyelash style that has dominated the scene, it is the “Cluster Lash” (Gadal Lash). Just a few years ago, traditional strip lashes were the go-to, but the trend has shifted toward these segment-style lashes that allow for precise, tailored eye design.
So, what makes cluster lashes so special? Why are both beginners and professionals switching to them? Here is everything you need to know about why cluster lashes are a game-changer and how to master them.
1. Why Cluster Lashes Are Superior (3 Key Reasons)
While strip lashes can be a nightmare if they don’t fit perfectly or start lifting, cluster lashes solve these common frustrations.
- Versatility Across Eye Shapes: Every eye is unique. Strip lashes often lift at the corners if they don’t match your eye’s curvature, but cluster lashes are applied in segments, ensuring a perfect, seamless fit regardless of your eye shape.
- Customizable Design: You are the designer. Whether you want a “cat-eye” by focusing on the outer corners or “doll eyes” by adding volume to the center, you can customize the lash placement to suit your specific aesthetic.
- Lightweight Comfort: Traditional strip lashes have a heavy band that can weigh down your eyelids. Cluster lashes feel practically weightless, making them comfortable enough for all-day wear.
2. Choosing Your Style: Cluster Lash Combinations
Not all cluster lashes are the same. Depending on the density and shape, the vibe can range from subtle to ultra-glam.
| Design Style | Characteristics | Recommended For |
|---|---|---|
| Slim Clusters | Fine, uniform hair | Those who want to boost their natural lash volume without looking “fake.” |
| Point Clusters | Slightly bundled tips | Those aiming for that trendy, defined “K-Pop Idol” look. |
| Mixed Clusters | Varied lengths/volume | Those who want a 3D, multi-dimensional effect with added depth. |
3. How to Apply Cluster Lashes in 10 Minutes (3-Step Guide)
Don’t let shaky hands stop you. Follow these three simple steps for a professional finish:
- STEP 1: Mapping the Design: Before applying glue, place the lash clusters along your lash line to decide exactly where you want them. (Usually, 3 segments in the center and 2 on the outer corner are perfect.)
- STEP 2: The “Tacky” Glue Rule: Apply glue to the lash base and wait about 5–10 seconds. Applying when the glue is at its stickiest ensures they adhere perfectly the moment they touch your skin.
- STEP 3: Apply from Below: Look down into a mirror. Place the cluster just above the roots of your natural lashes, not directly on the eyelid. Applying as close to the root as possible ensures a clean, natural look without gaps.
4. Pro-Tip: Boosting Longevity
Placement is just the beginning; keeping them on is key!
“Finish with Mascara” Once all the clusters are applied, gently brush through your natural lashes and the cluster lashes together with a light coat of mascara. This “marries” your natural lashes with the falsies, boosting hold and ensuring a seamless, high-volume finish.
5. Final Thoughts: Small Change, Big Impact
Cluster lashes aren’t just about length; they are a tool for corrective makeup that maximizes your unique features and minimizes imperfections.
- Beginner TIP: Start with a natural length (10mm–11mm). Going too long too early can make your look feel unnatural.
- Pro TIP: Layer clusters on top of each other for a more dramatic, high-fashion look. Have fun finding your “Golden Ratio.”
Start designing your own eye makeup look today. With the variety of cluster lashes from Touched Seoul, you can achieve that sophisticated, trendy look you’ve been seeing on your favorite idols. Give it a try—you might just find your new signature look!